
Designing a Startup Dental Operatory: Why a 12 O’Clock Cabinet Is Often All You Need

The Treatment Room
Setting up your first dental operatory can feel overwhelming. Between choosing equipment, cabinetry, and layout—there’s a lot riding on those first design decisions.
Here’s one you might not expect:
You may not need side cabinets at all!
Many new practices get the most value (and space efficiency) by starting with just a well-designed 12 o’clock cabinet. In this article, we’ll explain why—and what to consider if you’re building a treatment room from scratch.
Why the 12 O’Clock Cabinet Is the Smart Starting Point
When you’re designing your space, start with the Treatment cabinet (referred to commonly as the 12 O’Clock cabinet). Here’s what you need to make your workflow efficient and affordable.
Clean, Clutter-Free Workflow
Maximize your operatory’s efficiency by eliminating countertop clutter and creating a streamlined, modern workspace. Relocate the monitor to the upper cabinet using an articulating arm mounted to the rear wall—keeping it accessible but out of the way. Equipment like a Cavitron can be housed in a dedicated drawer with a built-in cable passthrough, allowing you to use it when needed and neatly conceal it when not. All computer and peripheral cables can be fully integrated and hidden within the cabinetry, with direct access to USB ports built into the unit itself. Biel’s new Power Wall Console makes this setup seamless, offering both clean aesthetics and functional access in one compact solution.

Biel’s Power Wall Console combines efficiency and utility in a sleek, modern design—helping your patients focus on their experience, not outdated cabinetry.
Better Ergonomics
Everything remains easily accessible for both the dentist and assistant—without the need for side cabinetry that can restrict movement or crowd the room. For added flexibility, consider adding a pivoting assistant or dental arm from your equipment supplier to create a movable countertop surface where you need it most. Alternatively, ask Biel about our extended countertop configuration, which provides an additional 8 inches of usable surface—seamlessly integrated into the design without compromising the clean, modern aesthetic.

Extended Countertop Configuration
Lower Build-Out Costs
Side cabinets require additional utility hookups, wall adjustments, and cabinetry fabrication. A single 12 o’clock setup simplifies your GC’s install process.
What About Nitrous?
Every practice has unique needs and preferences. Depending on your workflow, nitrous is an option that can be integrated into the center of the cabinet and tuck away when not in use. However, many start-ups are looking at ditching the cost. Flow-meter panel installation, electrical/IT routing for cabling, med-gas installation and permitting, trenching costs. That adds up! Instead, most startups are looking at doing nitrous carts for a efficient, integrated, and as needed solution.
Save Space Without Sacrificing Workflow
Traditionally, dental operatories have measured around 9 feet wide by 11 feet long, often including 18-inch-deep side cabinets with sinks on both sides. But if you do the math, a more efficient 8’ x 10’ treatment room—featuring only a 12 o’clock cabinet and no side cabinets—can actually give you more usable space.
That extra room makes a difference:
• More space for patients to sit comfortably with a family member
• A more open, inviting feel that enhances the patient experience
• Better maneuverability for your team without sacrificing functionality
Why Design a Smaller Room?
Reducing your operatory footprint doesn’t mean cutting corners—it means working smarter. Smaller rooms:
• Lower construction costs
• Free up floor space for additional treatment rooms or support areas
• Improve building efficiency for both solo and multi-provider practices
The result? A cleaner, less cluttered operatory with a modern, minimalist aesthetic that reflects today’s best design standards.
42” or 36” Treatment Cabinet
Both 42” and 36” cabinets are standard for the 12 O’clock units and Biel can provide configurations for both.
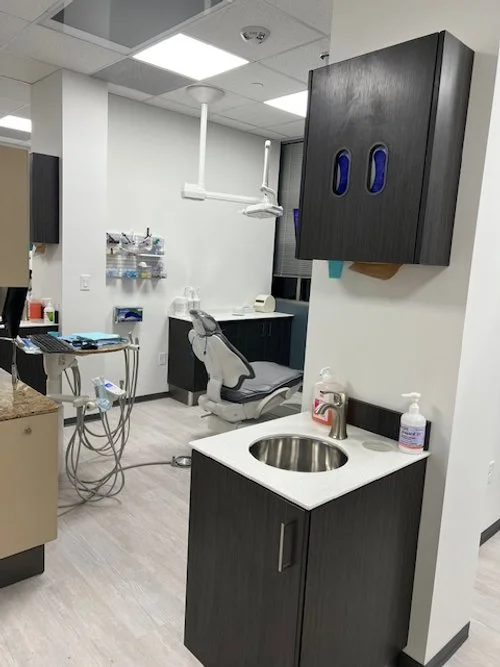
Rethinking Sink Placement in Modern Operatories?
In modern operatory design, many practices are choosing to eliminate in-room sinks in favor of more efficient shared solutions—like a “T-Wall” or “End Wall” sink positioned between two operatories, or a hallway-accessible sink that serves multiple rooms. You can even use a simple, elegant wall sink in the corner of the room.
In fact, when discussing new office layouts, many experienced doctors tell us their team rarely uses the in-room sink. Removing it not only frees up space—it can also lead to significant savings in construction and plumbing costs.
Pro Tip: Plan Plumbing Wisely
If you do choose to include sinks, be strategic. Align sinks along shared walls or in straight lines throughout the building to reduce trenching and utility runs. This simple step can help your contractor avoid costly zig-zagging through your floor plan—and keep your project on time and budget.
Final Thoughts
Designing your first operatory doesn’t have to mean overbuilding. By starting with a streamlined 12 o’clock cabinet and making smart choices about sinks, space, and cabinetry, you can create a treatment room that’s functional, cost-effective, and built for long-term success.
Whether you’re just getting started or refining your layout, Biel’s team is here to help you make confident, forward-thinking decisions.
Contact us for a design consult or Explore our cabinet configurations.
Written by David Biel, a part of the Biel Dental Cabinets team supporting efficient operatory design for new practices and established dental offices.